Showing posts with label how-to. Show all posts

15 November 2011

Thrifty Finds: Garnet Beads

Last week I spent my lunch at a consignment store. My crafty senses started tingling. At the jewelry counter I saw an 18" garnet necklace. As I examined the necklace I got excited at the $6 price sticker.


A strand of garnet beads can cost $5 and up. Over all the necklace featured 788 4mm, 56 5mm and 28 diamond shaped beads. That's 872 beads costing less than a penny each!


With a snip I deconstructed the necklace into a wealth of beads.


Tips for Bead Thrifting:

1. Look for unique beads, findings and pendants.
2. Not all beads are created equal. Choose quality jewelry.
3. Always be mindful of the price. To determine the cost per bead, divide the product price by the approximate quantity of beads.
4. Look in antique, consignment, flea markets, secondhand and thrift shops. Even retail stores can have nice beads on clearance.

07 March 2010

Fiber Nest Filler


As a crafter working with various fibers, I've accumulated unusable bits of ribbon, string and yarn that I cannot bear to throw away.


I put my fiber scraps and laundry lint in plastic fruit netting, and behold! nesting material for our neighborhood birds! Next time I might use a suet feeder.


Now I don't feel guilty for holding on to useless fibres and the spring birds will have warm nests for their chicks.


13 February 2007

Website Review: Craftster

With the anthem "No Tea Cozies Without Irony," Craftster is a forum for hip, rebellious crafters. The forum has approximately 88,300 members to date that "Loves to Make Stuff, Hates Potpourri". The number doesn't reflect crafty, unregistered "lurkers."

Craftster is literally an encyclopedia of diverse crafting ideas. Members share finished crafts, ask advice and get inspiration for their next project. Some finished projects are selected to become featured projects. Members also participate in craft swaps. Although using the forum for selling is forbidden, a section of the forum is designated for promoting crafty shops.

Craftster was started in 2003 by Leah Kramer, a computer programmer who describes herself as a "self-proclaimed craft junkie". Leah lives in Boston, MA; she owns Magpie, a store which features local artists and vintage collectibles. She also helps organize Bazaar Bizarre, a "not-your-granny's" craft fair.

In April 2006, Leah published The Craftster Guide to Nifty, Thrifty, and Kitschy Crafts: Fifty Fabulous Projects from the Fifties and Sixties, a full-color collection of fifty craft projects dated from the 1950s and 1960s.

Craftster has been featured by the press, including Time, Jane, Budget Living, San Francisco Chronicle, London Guardian, and Houston Chronicle, and on National Public Radio.

08 February 2007

Charity Crafts: Knit/Crochet Blocks

Just inside Michael's door sits a box of blocks. Knit and crocheted in a variety of colors, the blocks wait for one purpose: to become a blanket for someone in need. Michael's Warm Up America! program is the perfect opportunity to do charity work. As an added bonus you get rid of leftover yarn.

The requirements are simple: knit or crochet a 7" x 9" block out of 4-ply acrylic yarn. A full size afghan has forty-nine squares; seven strips of seven. The blocks are joined by volunteers, directed by the Store Event Coordinator.


15 January 2007

Recycling Old Cards

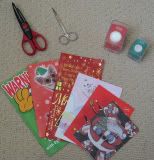
You need:
Old cards
Scissors (Straight edge or jagged)

Optional:
Card stock
Hole punch
Ribbon, string, or raffia

Every year, people send Christmas cards to friends and family. Although our loved ones appreciate the thought, the cards quickly lose appeal as the Christmas season progresses. They hit the garbage the day after Christmas, only to become fill in a garbage dump.

I reuse old cards to make gift labels. It allows me to personalize my gifts while recycling. You can use the recycled bits for scrapbooking and making new cards. It's quick and simple.

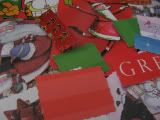
Because not all cards work, look through the stack for phrases, designs, and characters. Don't forget to look inside the card. Carefully cut them out with straight or jagged edged scissors.

Store the labels with your gift wrapping supplies. I keep mine in a plastic Ziploc bag to keep water out. An expanding file works as well. Organize labels by occasion for easy access.

When labelling, simply punch a hole and tie the label with a string. Don't forget to write a touching or humorous message!

10 December 2006

Herbal Hot/Cold Pads

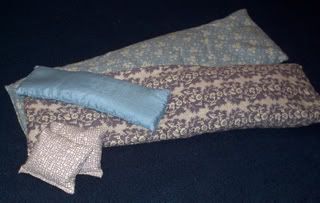
Sore muscles? Cramps? Herbal Hot/Cold Pads are perfect for everyday aches and pains. Simply microwave and place on your shoulders or wherever you're sore. Or stick it in the freezer to cool you down.

At the mall, herbal heating/cooling pads are sold for about $20-$30. You can make them for a fraction of the cost.


You need:
a fat quart of material, preferably cotton or flannel
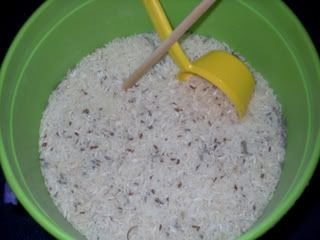
rice (do not use instant)
flax seed
dried lavender petals (or other dried herbs)
lavender/rosemary/peppermint essential oil
needle and thread
fabric pins (optional)

1. Mix rice, flax seed, and lavender in a large container. I use more rice because it is the cheapest ingredient. Add essential oils, but don't add too much because it's overpowering.

2. Cut fat quarter in half. Fold in half so the wrong side is on the outside. Pin and sew along two sides (a skinny and the long).

3. Turn inside out. Right side of material should be visible.

4. Fill 1/2 to 3/4 of sack with rice mixture.

5. Sew along opening to close.

Heat pad for approxiamately two minutes. Make sure the bag is not too warm as it'll burn the skin. Place on the shoulders. Relax!

Variations: Make two smaller squares. Send them outdoors with children on a cold day. Or cut out a small rectangle to make a eye mask. Heat/cool accordingly.

Also, try filling pads with other microwave-safe materials such as dried corn and buckwheat husks. Filler can be changed every few months to keep the pad fresh.

For Sale on Etsy:

Herbal Hot/Cold Pad

Herbal Hand Warmers

05 December 2006

Beading Tips: Organize

Many craft stores sell basic craft organizers. Unfortunately, these cases are often rudimentary; it's difficult to see the beads, and they tend to mix together. Beaders tend to quickly collect a vast variety of beading supplies. Here are a few ideas for organizing beads.

Cheap and Useful:
Clear containers are best. You can see what you have. organizers that allow for individual types to be kept together.

To avoid mixing beads, I found buying little containers similiar to
the ones tic tacs are packaged in help.

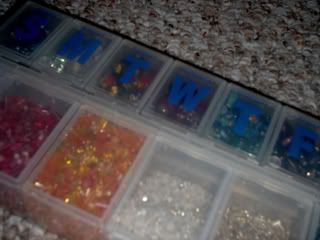
Containers meant for weekly pills are great for organizing seed beads.


Quick Tips:
Keep similar beads together. It's easier to design jewelry if cordinating beads are near each other. Organize by color, texture, and finish.


11 October 2006

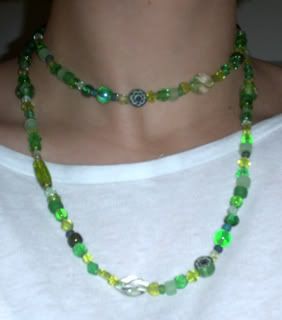
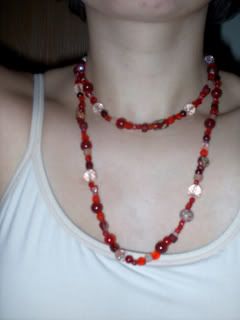
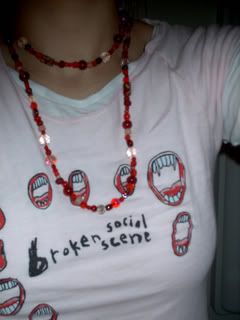
String of Beads Necklace


discussion at craftster

Tools: Various glass beads, nylon filament string (8 lb.), crimp tool, lobster clamp, crimp beads, crimp tool, bead tray (optional)

Estimated time: 1 1/2-2 hours

This project is a potential stash buster. Craft stores sell cheap bulk packages of glass beads if you need them. Different bead finishes (iridescent, faceted, clear, matte) add texture and character to the piece. Placing unexpected shades and sizes together gives the necklace an eclectic feel. Because I used only beads on hand, I had to add a clasp so I could wear mine. If you don't want to bother with crimps and clasps, make the necklace longer.

*Gather beads of similar colour.
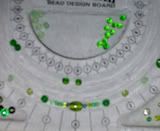
*If you have a bead tray, line the beads in a pattern, starting from the centre. Work your way to the ends. I found placing the larger beads first helps to keep placement random. While I placed the beads in pairs, the pairs don't have to be the same bead, but similar. If you don't have a bead tray, try to place beads as randomly as possible. Make sure to evenly distribute the weight.
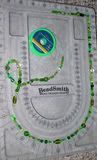


*Now to string the necklace. Originally, I cut the string to length, but I found it necessary to restring. When finished stringing the beads, add a crimp bead and clasp. Loop the end of the string back through the crimp bead, and use crimp tool. Cut string and repeat on the opposite end.

Project note: I used several heart-shaped beads. Remember, if you have such beads set across from each other, make sure to have the "up" side toward the ends to ensure they match each other--or don't if you don't care.
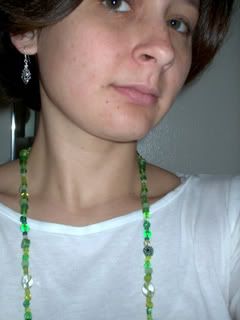


the green necklace is for sale at my etsy shop