Showing posts with label tutorial. Show all posts

20 January 2014

Blog Swap: Craft From Your Stash Hoopla Dreamcatchers

It’s time for another blog swap! Wondra (Wondra's World) and I spend Wednesday nights crafting and chatting over Skype. Sometimes there’s more chatting than crafting, but it’s always epic. A couple of weeks ago we realized that we hadn’t swapped blogs in almost a year! To remedy this, we’re sharing craft from your stash tutorials. 


Hoopla Dreamcatchers:


Hello from South Wales! It's Wondra from Wondra's World again and I've stopped by to share a fun stash busting project.

It's easy to turn this:


into this:


What you need:

embroidery hoop
hemp, leather cord, embroidery floss
beads

What to do:

  1. Separate the hoops and wrap them in hemp or leather cord.
  2. With the first hoop, wrap embroidery floss or hemp cord loosely around the outside of the hoop.
  3. Now start weaving.
  4. Add beads when you get to the center and tie it off to finish.
  5. With the second hoop, tie lengths of hemp or embroidery floss (or feathers or whatever) around the center and bead it up.
  6. Tie the hoops together and you're done.

This was my first attempt at making a dream catcher. It's a little bit lopsided but I think it turned out alright.

If you're going to do this yourself, I'd suggest you use different sized hoops and just tie them together loosely. It's a fun project but can be time consuming so give yourself an hour or so.


Thank you for the tutorial Wondra! 


Don't forget to visit Wondra’s World for my Catch-All Bowl tutorial.

19 August 2013

Roasted Chickpeas

Monday lunches tend to be leftovers. We had pasta and salad last night, so I decided to eat the salad. I added chickpeas for a quick protein.


The salad was delicious, but I had a lot of uneaten chickpeasperfect for experimenting with roasted chickpeas!


Roasted Chickpeas (makes 2 cups)
Recipe based on this Roasted Chickpea recipe from Jessica of how sweet it is.


Ingredients:
2 cups cooked chickpeas
1-2 teaspoons olive oil spray
1/4 teaspoon salt
1/4 teaspoon pepper
1/4 teaspoon garlic powder
1/4 teaspoon paprika

Directions:

  1. Preheat oven to 425 degrees.
  2. Place rinsed chickpeas on a paper towel. Pat dry and remove any loose skins.
  3. Cover baking sheet with aluminum foil. Place chickpeas on baking sheet.
  4. Lightly mist chickpeas with olive oil. Sprinkle with salt, pepper, garlic, and paprika. Roll chickpeas to coat.
  5. With chickpeas in a single layer, bake for 15 minutes.
  6. Remove from oven and roll chickpeas. Bake for another 15 minute.
  7. Let cool and eat!

The chickpeas smelled delicious as they cooked. Some of the chickpeas were still chewy when I removed them from the oven, so I cooked them for an additional 7 minutes. This will probably vary from oven to oven. 


Roasted chickpeas high in protein and a great alternative to chips. They have a similar taste and texture as corn nuts and taste best after they have cooled.


It was my first time using one of Jessica's recipes, and I found her conversational directions easy to follow.

I recommend trying this recipe. Next time I will use honey to make a sweet and salty version.
 

08 March 2013

Healthier No Bake Cookies

No bake cookies are one of my favorite desserts. The combination of chocolate, peanut butter, and oats is amazing. When I saw this pin on Pinterest for a healthier no bake cookie I had to try it.

Healthier No Bake Cookies (Makes 24-36 cookies)


Ingredients
  • 1 ripe banana, mashed
  • 1 cup sugar
  • 1/4 cup cocoa powder
  • 1/2 cup vanilla soymilk*
  • 1/2 cup crunchy peanut butter*
  • a pinch of salt
  • 1 tsp. pure vanilla extract
  • 3 cups old fashioned oats*
*Substituted from original recipe.


Directions
  1. Combine all ingredients excluding oats and vanilla extract in a medium saucepan. Bring to a boil over medium heat. Stir often with a wooden ladle.
  2. Boil for one minute. Remove from heat.
  3. Add oats and vanilla extract. Stir well.
  4. Cook on medium heat for 2-3 minutes. Stir often.
  5. Drop by teaspoonfuls onto waxed paper. Let cool to room temperature.


You may not like the healthier version if you're expecting the same taste and texture as regular no bake cookies. The hint of banana distracts from the chocolate and peanut butter. Maybe they should be renamed Banana No Bake Cookies.

You can see my substitutions are asterisked. I did not have instant oats so I used old fashioned oats. Old fashioned oats take longer to cook so I heated the mixture for about two minutes after I mixed them in. I also replaced creamy peanut butter with crunchy peanut butter (which is always a treat).

The healthier no bake cookies are certainly interesting. I will continue to tweak the recipe. Let me know if you have any suggestions!

24 May 2012

Puerto Rican Coffee

When I wake up I have a certain routine: put in my contacts, make a pot of coffee, and then feed Misty. Misty likes to think her breakfast is first on my agenda, but she usually contents herself by meowing methodically as I make the coffee.

After I fed Misty this morning I noticed I could not hear or smell the coffee brewing. I was puzzled since I had just cleaned the coffeemaker with water and vinegar. It had been working quite well for several days, but the coffee burner was not warm. My research told me it would be cheaper to buy a new coffee maker.

As they say, necessity is the mother of all invention. I did not want to go out for coffee, so I decided to try Puerto Rican Coffee.

I brought 8 oz. of water (per cup of coffee) close to boiling. I added 2-3 tablespoons of ground coffee and stirred for 6 minutes. Then I filtered the grounds from the water.

 I used a coffee filter, bread ties, and a mason jar to filter my coffee.

I put the water back in the pot and added creamer until it was the color I usually drink my coffee. I let the water simmer for another 2 minutes, stirring occasionally.


Although it does take longer than automatic drip, Puerto Rican coffee is worth the wait. My morning coffee was delicious and full of flavor. It would pair perfectly with dessert. Now I just have to plan my housewarming party.

17 May 2012

Corey Marie's Watercolor Techniques

Although I do not consider myself an artist, if I was one I am sure I would choose watercolors. The moment that the paint touches the paper is pure magic. A couple of years ago I bought Water Paper Paint: Exploring Creativity with Watercolor and Mixed Media with plans to learn techniques, but I have not been able to put much time into it.


When I visited my friend Corey Marie's website yesterday I found that she recently posted a watercolor tutorial, 12 DIY Watercolor Techniques for art journals. Not only does her tutorial explain how to use common household items to create watercolor effects, it also features unique pictures of the techniques.

image by Corey Marie

Corey Marie and I went high school together. We were both in band (don't forget we were a big deal in our small town), and she produced the first 'zine I encountered. Corey recently moved back to our hometown, Eaton Rapids, where she makes her living as an illustrator. She is pretty rad, and you should take the time to check out the rest of her blog and shop.

Now that I have more time I hope to explore watercolors (and perhaps enroll in a beginner's class at the Ella Sharp Museum of Art and History).

05 March 2012

Frozen Smoothies

Variations of make ahead frozen smoothies such as Freezer SmoothiesGreen Smoothie Cups, and Make Ahead Smoothies are mainstays of food boards on Pinterest. Smoothies are a light yet filling fruit and/or vegetable blend high in antioxidants and vitamins. They are energizing and perfect for breakfast or as a snack.


When I made Freezer Jam I had extra strawberries so I cut up and froze them with bananas and grapes. I also froze yogurt in a silicone muffin pan. After they were frozen I put one cup frozen fruit and one yogurt cube into a freezer bags; I ended up with six bags of pre-made smoothies.

To make the smoothie simply add juice or milk and blend until smooth. I did not have juice so I juiced three oranges for approximately 3/4 cup of fresh orange juice. You could also add flax seed, honey, soy protein, or wheat grass for additional benefits.


My smoothie was delicious! I look forward to enjoying this frozen treat on a hot summer's day!

15 November 2011

Thrifty Finds: Garnet Beads

Last week I spent my lunch at a consignment store. My crafty senses started tingling. At the jewelry counter I saw an 18" garnet necklace. As I examined the necklace I got excited at the $6 price sticker.


A strand of garnet beads can cost $5 and up. Over all the necklace featured 788 4mm, 56 5mm and 28 diamond shaped beads. That's 872 beads costing less than a penny each!


With a snip I deconstructed the necklace into a wealth of beads.


Tips for Bead Thrifting:

1. Look for unique beads, findings and pendants.
2. Not all beads are created equal. Choose quality jewelry.
3. Always be mindful of the price. To determine the cost per bead, divide the product price by the approximate quantity of beads.
4. Look in antique, consignment, flea markets, secondhand and thrift shops. Even retail stores can have nice beads on clearance.

30 August 2011

Pew Bow Tutorial

After I saw the price of tulle bows ($7.99 for one bow!), I decided to buy tulle and make them myself.

I made two sizes: large bows to hang on the church pews and small bows to attach to a tulle garland. I based my project on the Pew Bows and a Bow Tutorial from Jill Rule & Co.


This project requires a ruler, corkboard (or thick foam), pins and tulle. I recommend T pins; sewing pins bend too easily.


I placed two pins 15 inches (7 inches for the smaller bows) apart. Then I wrapped the tulle around the pins approximately 10 times. 


I cut a piece of tulle about 5 inches long. I wrapped it around the loops and tied a knot.


After I tied the knot, I pulled the loops into fluffy bows. 


The bows were an easy project that only took a couple hours. I recommend this project to the indie and/or frugal bride.

If you liked these tulle pew bows, you will also like the DIY Pom Poms on Once Wed's site.

28 June 2011

Crochet Rings

I live in a small space. I have little room to store my accessories--especially the many scarves I own (what can I say, I am a little bohemian). Even though most of my belongings are in storage (I fear I'm going to have doubles and triples of things when I move this fall), my closet is cramped. I long for organization.

The nice thing about purchasing scarves is they often come with plastic rings. The rings work well with over-the-door hooks but they are plain. I wanted something a little more homey.


I single crocheted recycled silk yarn around the rings. I am pretty sure I have more rings somewhere; I will have to wait until the fall to find them!


21 May 2011

Coffee and Tea Dyed Yarn

Although many of us enjoy iced coffee or sun tea on a warm summer's day, they are not just for drinking--you can also use coffee and tea to dye yarn! I have been interested in dyeing for some time, and Friday's rain made it a great day to experiment. 


Natural fibres (cotton, hair, linen, silk, wool, etc.) are easily dyed.  For centuries humans used herbs and berries to change the color of fabric, yarn and even paper. While modern commercial dyes have consistant color, they sometimes include strong chemicals.

Dyeing yarn with Kool-Aid is an alternate to using commercial dyes. Using packets of Kool-Aid you can dye a broad range of vibrant colors. I recommend the following tutorials: Leethal's Crockpot Kool-Aid DyeingKnitty.com's Dyed in the Wool or Eunny's Techniques: Self-Striping Yarn).

Coffee and tea can be used to dye fibres as well. Many crafters use them to make fabric, yarn and paper appear aged. I chose four teas (green, black, Earl Grey, and chamomile) and a coffee for my experiment.


I boiled water in a tea kettle and poured it into mason jars. I used two types of yarn: a wool blend and silk ribbon yarn. Both were from thrifted sweaters I unraveled. I looped the yarn around my arm to create loose sections.  I soaked the yarn in lukewarm water with splash of vinegar, pushing the air bubbles out of the yarn so it would be thoroughly saturated. The tea brewed for an hour before I added the yarn.


The yarn soaked in the dye for four hours. I rinsed it in the sink, and then I gently pressed out the excess water with towel. After the yarn dried I roll it into balls.


The variables make the dyeing possibilities endless. I got five different shades of soft brown. A darker hue would require another tea bag and an overnight soak. 

My next project for the yarn to explore knit, crochet and macramé texture.

07 March 2010

Fiber Nest Filler


As a crafter working with various fibers, I've accumulated unusable bits of ribbon, string and yarn that I cannot bear to throw away.


I put my fiber scraps and laundry lint in plastic fruit netting, and behold! nesting material for our neighborhood birds! Next time I might use a suet feeder.


Now I don't feel guilty for holding on to useless fibres and the spring birds will have warm nests for their chicks.


05 August 2008

Skinny Scarf Tutorial

Scarves are versatile accessories. Super skinny scarves look great with a tank and jeans. Simply wrap around your neck several times and you are glamorous. And skinny scarves are amazingly simple to create.

You don't have to bust the bank to use scraps of yarn or buy a single skein.  Achieving different styles is as easy as varying the stitches and yarn.


Materials:
Scrap balls of yarn or on skein
Crochet hook or knitting needle
Piece of cardboard to size (optional)

Skill: Beginner to intermediate

Time: An evening watching tv or a movie


Crochet: Ch desired width of scarf (varies with hook/yarn ply). Ch 2 and turn. DC (British TC) in each hole until reach end of row. Ch 2, turn, and continue until yarn is depleted or desired length is met. Weave in ends

Knit: Cast on desired width. Knit rows until yarn is depleted or desired length is met. Knit/Purl stitches can be alternated to add texture. Cast off. Weave in ends.


Suggestions: Dig into your stash to create a unique bohemian look. Add stripes by alternating yarns. Or simply grab a handful of yarns and knit or crochet them together. Add tassels for fun and flair.


Find more ideas and patterns at Knitty,  RavelryAntiCraft, and Craftster.

13 February 2007

Website Review: Craftster

With the anthem "No Tea Cozies Without Irony," Craftster is a forum for hip, rebellious crafters. The forum has approximately 88,300 members to date that "Loves to Make Stuff, Hates Potpourri". The number doesn't reflect crafty, unregistered "lurkers."

Craftster is literally an encyclopedia of diverse crafting ideas. Members share finished crafts, ask advice and get inspiration for their next project. Some finished projects are selected to become featured projects. Members also participate in craft swaps. Although using the forum for selling is forbidden, a section of the forum is designated for promoting crafty shops.

Craftster was started in 2003 by Leah Kramer, a computer programmer who describes herself as a "self-proclaimed craft junkie". Leah lives in Boston, MA; she owns Magpie, a store which features local artists and vintage collectibles. She also helps organize Bazaar Bizarre, a "not-your-granny's" craft fair.

In April 2006, Leah published The Craftster Guide to Nifty, Thrifty, and Kitschy Crafts: Fifty Fabulous Projects from the Fifties and Sixties, a full-color collection of fifty craft projects dated from the 1950s and 1960s.

Craftster has been featured by the press, including Time, Jane, Budget Living, San Francisco Chronicle, London Guardian, and Houston Chronicle, and on National Public Radio.

15 January 2007

Recycling Old Cards

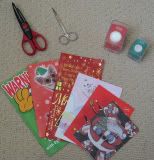
You need:
Old cards
Scissors (Straight edge or jagged)

Optional:
Card stock
Hole punch
Ribbon, string, or raffia

Every year, people send Christmas cards to friends and family. Although our loved ones appreciate the thought, the cards quickly lose appeal as the Christmas season progresses. They hit the garbage the day after Christmas, only to become fill in a garbage dump.

I reuse old cards to make gift labels. It allows me to personalize my gifts while recycling. You can use the recycled bits for scrapbooking and making new cards. It's quick and simple.

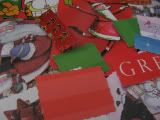
Because not all cards work, look through the stack for phrases, designs, and characters. Don't forget to look inside the card. Carefully cut them out with straight or jagged edged scissors.

Store the labels with your gift wrapping supplies. I keep mine in a plastic Ziploc bag to keep water out. An expanding file works as well. Organize labels by occasion for easy access.

When labelling, simply punch a hole and tie the label with a string. Don't forget to write a touching or humorous message!